IRON NEST Guide: Controls and First Firing Cycle

An IRON NEST guide for beginners: learn the core controls, map geometry, calculator setup, loading checks, and impact-based correction for a first firing cycle.

Direct Answer

Use the beginner workflow in three stages: Measure, Load, and Fire. Start from active reports, build a target from source-based map geometry, and convert it to a Nest-to-target firing measurement. Use the final red map line as the active bearing and range input before compute. Before loading, match shell and charge with the fire mission card. After matching load settings, fire and apply correction from map impact feedback.

Operator workflow

Follow the firing cycle

  1. Teleprinter and clipboard

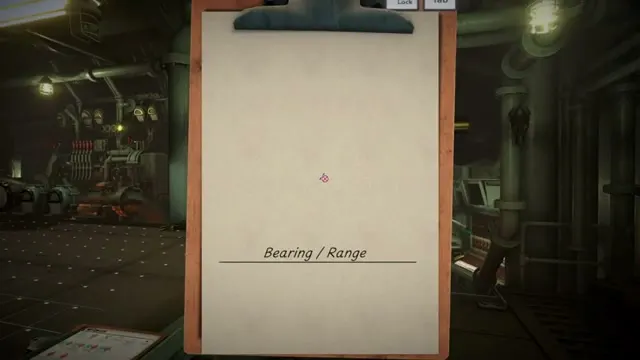
    Read the active report

    Action
    Open the newest order and reports. Record each bearing or distance together with the named reporting source, and keep that report visible while you move to the map.
    Success signal
    You can point to the current objective, the report source, and the exact value that belongs to that source.
    Recovery
    If the source or value is unclear, reopen the report and discard any map mark made from memory.
    IRON NEST clipboard open to a bearing and range report beside the operator stations.
    Gameplay frame: Savage Vegeta · 01:30
  2. Tactical map

    Plot the target candidate

    Action
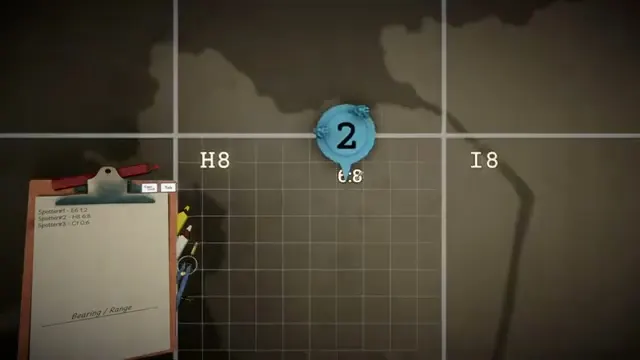
    Place every report at its own source. Draw a bearing from that source or a distance arc around it, then use the independent constraints to find one candidate point.
    Success signal
    At least two current constraints support the same candidate, and every line or arc can be traced back to its report.
    Recovery
    If the constraints do not agree, check their origins and copied values. Do not force an intersection or average incompatible reports.
    IRON NEST tactical map with a numbered marker and the active report clipboard visible.
    Gameplay frame: Savage Vegeta · 04:30
  3. Tactical map

    Measure from IRON NEST

    Action
    After accepting the target point, draw one final red line from the current IRON NEST marker to that point. Keep its range and bearing together as the firing measurement.
    Success signal
    The active red line begins at IRON NEST, ends at the chosen target, and no older red line can be mistaken for it.
    Recovery
    If the line starts at a spotter or the Nest position changed, clear it and measure again from the current Nest marker.

    Range goes to the ballistic calculation; bearing remains the traverse setting for the gun.

  4. Ammunition controls and calculator

    Select the shell and load plan

    Action
    Match the shell to the current target description or explicit order, then choose the powder-charge count you intend to load for the measured distance.
    Success signal
    One written plan names the active target, intended shell, powder charge, measured range, and bearing.
    Recovery
    If the order does not establish the shell role, pause before loading and reread the objective. Do not infer a universal shell rule from one mission.
  5. Ballistic calculator

    Compute the firing solution

    Action
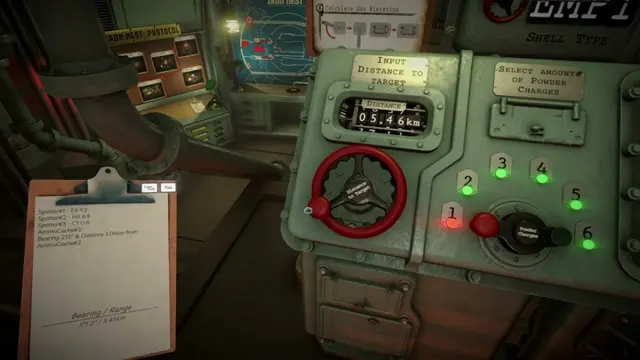
    Enter the measured target distance, select the powder-charge count, and compute the matching elevation and flight time. Keep the map bearing beside this result for traverse.
    Success signal
    The result card reflects the current distance and selected charge, and the separate bearing still belongs to the same final red line.
    Recovery
    If distance or charge changes, discard the old result and compute again before touching the loading controls.
    IRON NEST ballistic calculator showing target distance and selectable powder charges.
    Gameplay frame: Savage Vegeta · 06:45
  6. Loading deck and gun controls

    Load and set the gun

    Action
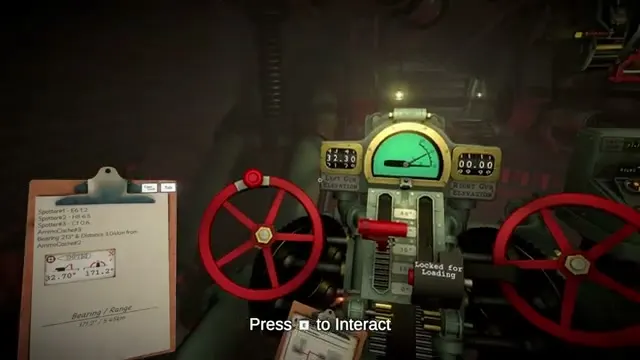
    Before committing the round, match the shell and charge to the current plan. Ram and close the breech, then set the saved bearing and computed elevation on the selected gun and arm it.
    Success signal
    The loaded shell and charge, traverse bearing, elevation, selected barrel, and armed state all describe one current shot.
    Recovery
    Stop before ramming when any value disagrees. Once a shell is rammed or a charge is dispensed, follow the in-game safe firing sequence instead of assuming it can be returned.
    IRON NEST gun controls with elevation gauges and the loading lock indicator visible.
    Gameplay frame: Savage Vegeta · 08:50
  7. Trigger controls and tactical map

    Fire and assess the impact

    Action
    Fire only after the final cross-check, then return to the map and current reports to compare the observed impact with the intended target.
    Success signal
    The objective confirms the intended effect, or the game provides enough impact information to begin one controlled correction cycle.
    Recovery
    For a miss or unclear result, start again with the newest report and target point. Recompute rather than patching an old card with guessed offsets.

Basic controls you will use constantly

Confirm core movement and interaction keys before a shot cycle. Move with WASD, jump with Space, sprint with Left Shift, crouch with Ctrl, and interact with E. Keep this baseline each cycle.

Use Left Click for environment and teletype interaction. In map mode, hold Left Click and drag map objects when placing or moving marks. Use this only for objects you need to relocate.

Use Caps Lock to show or hide the clipboard. Hold Tab to maximize the clipboard for a quick review. Use Right Click to clear a selected clipboard item or map measurement line before a new mark.

Read the report first

Use the live order and active report list, not saved notes. If a report has bearing or range, capture its source point first. Keep that value tied to that source.

Before drawing, confirm the selected report line. If any line is unclear, reopen the report before measuring. Keep the selected report visible through the target-measure step.

Do not turn report text directly into turret values. Keep report data as context only, then create map geometry and calculator output before loading. Confirm the result with the latest map measurement. Use report values only when they are tied to a named source.

Measure phase: build target point by source geometry

Place each report marker at its named source and draw from that same source. Use Compass for distance circles and white marker for ordinary lines. This keeps each mark traceable to its report source.

Each marker tool has one role: compass for radius, white for geometry baseline, yellow and red for bearing/range checks. Keep that distinction for repeatable setup. Use one active workflow for each cycle.

Yellow marker measures bearing and range without saving the result to clipboard. Use Red only when the measurement is ready for firing prep. Remove obsolete map measurements before the final red measurement.

Use red marker for the values that enter firing setup. Red marker measures bearing and range and saves it to clipboard. Clear unrelated marks before compute so only current-cycle data remains.

Measure phase: convert map geometry to firing geometry

Report values suggest a target candidate, but the firing geometry comes from IRON NEST. Redraw one final line from IRON NEST to the target with red marker and treat it as the firing measurement. This is the only line sent to compute.

Keep spotter lines only while checking the target location. Loading uses the final Nest-to-target measurement. Do not compute directly from a spotter-origin line.

Keep map work and calculator work separate

Separate map work from calculator work. Map work builds the target point. Calculator work turns measured range and selected charge into elevation and card output.

Do one sequence at a time: map marks for geometry, then one compute pass for the fire mission card. Keep any alternate drafts out of the active cycle. Do not add more geometry after compute without a new measurement pass.

Run compute after the final Nest-to-target bearing and range is set. The first charge number illuminated green is the minimum charge count for that entered range. The fire mission card belongs to the most recent compute input.

For the same entered range, increasing charge lowers elevation and flight time. If range or charge changes, compute again before loading. This avoids stale input.

The fire mission card belongs to the current shot and is not a queue for later. If any value differs from the latest measurement, recompute and refresh the card before loading. Keep one card for this shot only.

Load phase: verify ammo and charge before commit

Before loading, compare shell type and charge with the fire mission card and turret load state. If either differs, return to compute. Begin loading only when both match and the intended shell is selected. Keep the comparison current.

The charge counter shows how many powder charges to load based on the most recent ballistic-calculator input, and it does not automatically track multiple planned fire missions/cards. Use it as a current-cycle indicator only. Recompute if the latest inputs changed.

Once a shell is rammed, the only way to unload it is to fire. Once a charge is dispensed, it cannot be returned to the charge magazine. This is a hard stop for the loading state until firing occurs.

Fire phase: confirm settings and execute

Use the main console as your final check for elevation, flight time, shell type, armed state, and turret rotation. Confirm bearing in your normal aiming view separately. Check these values against the current target before trigger pull.

Elevation cannot be adjusted during loading, but can be adjusted once the breech is closed. If confirmation switches are present, use them as optional checks only. Do not pull the trigger before these checks are complete.

Arm the selected gun(s), then pull trigger after checks align. After the shot, read map impact feedback and compare it with the candidate target. Apply one correction step in the next cycle using the same Measure, Load, Fire structure.

Watch the walkthrough

Continue reading